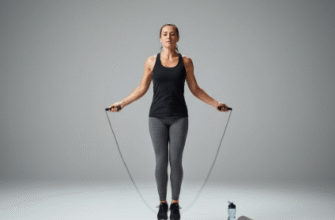
Finding space and motivation for home workouts can sometimes feel like a challenge. Maybe you don’t have room for bulky weights, or perhaps the idea of complex machinery is intimidating. That’s where resistance bands step in – these simple, stretchy tools are incredibly versatile and pack a surprising punch when it comes to building strength and improving fitness without ever leaving your house.
Forget thinking of them as just flimsy physiotherapy aids. Modern resistance bands come in various strengths, sizes, and styles, offering a scalable challenge suitable for almost anyone, from absolute beginners to seasoned fitness enthusiasts looking to add variety to their routines. They are lightweight, portable, and remarkably affordable, making them one of the most accessible pieces of fitness equipment available.
Why Choose Resistance Bands for Home Fitness?
The appeal of resistance bands goes far beyond just convenience. They offer unique advantages that traditional free weights or machines sometimes lack.
Variable Resistance: Unlike dumbbells, which provide a constant weight throughout a lift, resistance bands offer variable resistance. This means the tension increases as you stretch the band further. This mimics the natural strength curve of many muscles, challenging them more intensely at the point where they are strongest (usually near the end of the movement) and providing less resistance at the weaker points (usually the start). This can lead to improved muscle activation and strength gains.
Joint-Friendly Training: The elastic nature of bands provides a smoother, lower-impact form of resistance compared to jarring weights. This can be particularly beneficial for individuals with joint sensitivities or those recovering from certain injuries (always consult a professional first, though!). The tension is more controlled, reducing stress on tendons and ligaments.
Portability and Space Saving: This is a huge plus for home workouts. A whole set of bands takes up minimal space – easily stored in a drawer or bag. You can take them anywhere: the living room, the backyard, or even on vacation. No dedicated gym room needed!
Cost-Effective: Compared to a gym membership or purchasing dumbbells, kettlebells, and machines, a quality set of resistance bands is incredibly budget-friendly. You can get a full range of resistance levels for a fraction of the cost.
Versatility Unleashed: The sheer number of exercises you can perform with resistance bands is staggering. They can be used for upper body, lower body, core work, mobility drills, assistance (like helping with pull-ups), or adding resistance to bodyweight exercises (like push-ups or squats). You can anchor them to doors, furniture (carefully!), or simply use your own body.
Types of Resistance Bands
Navigating the world of bands can be slightly confusing initially. Here’s a quick rundown:
- Loop Bands (Power Bands): These are continuous loops of thick, durable rubber, often color-coded by resistance level. They are excellent for adding resistance to squats, glute bridges, providing assistance for pull-ups, and performing heavy-duty exercises like banded good mornings.
- Tube Bands with Handles: These are rubber tubes, typically with handles attached to each end. They often come with door anchors and ankle straps, making them great for mimicking cable machine exercises like chest presses, rows, bicep curls, and triceps extensions.
- Therapy Bands (Flat Bands): These are long, thin, flat strips of latex or non-latex material without handles. They usually offer lighter resistance and are popular in physical therapy settings but are also useful for mobility work, warm-ups, and lighter resistance exercises for smaller muscle groups.
- Mini Bands (Hip Circle Bands): Smaller loop bands, often made of fabric or latex, designed to be worn around the thighs or ankles. They are fantastic for activating the glutes and hips during warm-ups or lower body exercises like lateral walks and clamshells.
Getting Started: Tips for Success
Ready to jump in? Keep these points in mind:
Choose Your Resistance Wisely: Most bands are color-coded, but resistance levels can vary between brands. Start with a lighter band to master the form of an exercise. You should feel the target muscle working, and the last few repetitions of a set should be challenging but achievable with good technique. If it feels too easy, move up. If your form breaks down, choose a lighter band.
Warm-Up is Crucial: Just like any workout, prepare your body. Spend 5-10 minutes doing light cardio (like jogging in place or jumping jacks) and dynamic stretches (like arm circles, leg swings) to get your blood flowing and muscles ready.
Focus on Control: The magic of bands lies in controlled movement. Avoid letting the band snap back; control the eccentric (returning) phase of the movement just as much as the concentric (stretching) phase. This maximizes time under tension, which is key for muscle growth and strength.
Anchor Points: If using tube bands with a door anchor, ensure the door is sturdy and securely closed (ideally locking). When wrapping bands around furniture, check that it’s heavy and stable enough not to move or tip over. Safety first!
Prioritize Form Over Resistance! It’s tempting to grab the heaviest band, but poor form won’t get you results and significantly increases injury risk. Focus on performing each exercise correctly through its full range of motion. If you’re unsure, watch reliable tutorial videos or consider a session with a trainer. Master the movement with lighter resistance before progressing.
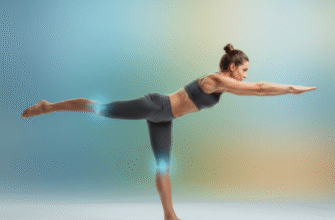
Sample Resistance Band Exercises for Home
Here are a few ideas to get you started, targeting different muscle groups. Aim for 2-4 sets of 10-15 repetitions for most exercises, adjusting based on the band’s resistance and your fitness level.
Upper Body Blast
- Bicep Curls: Stand on the middle of a tube band, holding the handles with palms facing up. Keeping your elbows tucked into your sides, curl the handles up towards your shoulders. Slowly lower back down.
- Overhead Press: Stand on the band, holding handles at shoulder height, palms facing forward. Press the handles straight up overhead, fully extending your arms. Lower back down with control. (Can also be done seated).
- Bent-Over Rows: Stand on the band with feet hip-width apart, knees slightly bent, and hinge at your hips (keeping your back straight). Hold the handles or loop band ends. Pull the band towards your chest, squeezing your shoulder blades together. Lower slowly.
- Chest Press (Anchored): Secure the band to a stable anchor point behind you at chest height. Facing away from the anchor, grab the handles and step forward until there’s tension. Start with hands at chest level and press forward until your arms are extended. Return slowly.
- Band Pull-Aparts: Hold a lighter loop or therapy band straight out in front of you at shoulder height with an overhand grip, hands shoulder-width apart. Keeping your arms straight, pull the band apart horizontally, squeezing your shoulder blades together. Return slowly. Great for posture and shoulder health.
Lower Body & Glutes
- Banded Squats: Place a loop band around your thighs, just above the knees. Stand with feet shoulder-width apart, toes pointing slightly out. Push your hips back and lower into a squat, actively pushing your knees out against the band. Ensure your chest stays up and back straight. Return to standing.
- Glute Bridges: Lie on your back with knees bent, feet flat on the floor, hip-width apart. Place a mini band or loop band around your thighs, just above the knees. Push your knees out against the band and lift your hips off the floor until your body forms a straight line from shoulders to knees. Squeeze your glutes at the top. Lower slowly.
- Standing Kickbacks: Anchor a tube band low or loop one end around your ankle and the other around a stable object (or stand on it with the other foot). Keeping your core tight and a slight bend in the standing knee, kick the banded leg straight back, squeezing the glute. Control the return.
- Lateral Walks: Place a mini band around your ankles or just above your knees. Get into a slight squat position. Step sideways, keeping tension on the band and your feet parallel. Take several steps in one direction, then return.
Core Connection
- Pallof Press (Anti-Rotation): Anchor a band at chest height. Stand sideways to the anchor point and hold the handle or end of the band with both hands in front of your chest. Step away from the anchor to create tension. Brace your core and press the band straight out in front of you, resisting the urge to rotate towards the anchor. Hold briefly and return slowly. Complete reps on both sides.
- Banded Wood Chops: Anchor the band high. Stand sideways, feet shoulder-width apart. Grab the handle/end with both hands up near the anchor side. Keeping arms mostly straight, pull the band diagonally down and across your body, rotating your torso. Control the return. Repeat and switch sides. Can also be done low-to-high.
Putting It All Together
You don’t need hours. A simple full-body routine could involve selecting 2-3 exercises for the upper body, 2-3 for the lower body, and 1-2 core exercises. Perform the chosen sets and reps, resting briefly between sets (30-60 seconds).
Aim for 2-4 resistance band workouts per week on non-consecutive days to allow your muscles time to recover and adapt. As you get stronger, you can increase the resistance (use a heavier band), add more repetitions or sets, or decrease rest time. This principle of progressive overload is key to making continued progress.
Listen to your body. Don’t push through sharp pain. Muscle soreness (DOMS – Delayed Onset Muscle Soreness) is normal a day or two after a new or intense workout, but sharp, immediate pain is a signal to stop.
Resistance bands offer a fantastic, adaptable, and effective way to achieve your fitness goals from the comfort of home. They prove that you don’t need expensive equipment or a lot of space to get a challenging and rewarding workout. Embrace the stretch, focus on form, and discover the power of these simple, yet mighty, fitness tools!