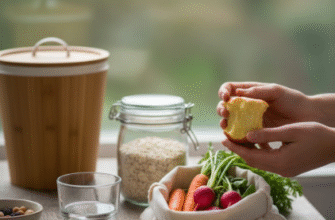
Ever stare sadly at that slightly wilting bunch of carrots or those radishes losing their crispness? We’ve all been there. Food waste is a real bummer, not just for our wallets but for the planet too. But what if you could transform that near-forgotten produce into something vibrant, tangy, and utterly delicious? Enter the wonderful world of food preservation, and specifically, let’s talk about one of the most accessible and downright fun methods: pickling!
Forget the image of dusty jars in grandma’s cellar (though those have their own charm). Modern pickling is creative, surprisingly simple, and a fantastic way to capture the taste of seasons, reduce waste, and add a zesty punch to your meals. It’s less intimidating than full-on canning and offers quicker rewards, especially with refrigerator or ‘quick’ pickles.
So, What Exactly is Pickling?
At its core, pickling is a method of preserving food in an acidic solution, usually vinegar, or through anaerobic fermentation in brine (salt and water). The high acidity or the lactic acid produced during fermentation inhibits the growth of spoilage-causing bacteria, keeping the food safe and edible for longer. Think of it as creating an environment where fresh flavors get locked in, but bad microbes can’t thrive.
There are two main paths you can wander down in the pickling universe:
- Quick Pickles (Refrigerator Pickles): This is likely where you’ll start your adventure. Vegetables (or fruits!) are packed into jars and covered with a hot brine, typically made of vinegar, water, salt, and sugar. Once cooled, they’re stored in the refrigerator. They aren’t shelf-stable like canned goods but will last for several weeks, developing more flavor over time. They retain a fantastic crunch and bright taste.
- Fermented Pickles: This is the old-school method that relies on salt, water, and the natural bacteria present on the vegetables. Over time (days or weeks), these bacteria convert sugars into lactic acid, which preserves the food and creates that characteristic tangy, complex, slightly funky (in a good way!) flavor. Think traditional dill pickles or sauerkraut. This method requires a bit more attention to detail regarding salt concentration and temperature.
For now, let’s focus on the joy and ease of quick pickling. It’s the perfect gateway preservation technique.
Getting Your Pickle On: The Quick Pickle Method
Ready to try? It’s genuinely easy. You don’t need specialized equipment beyond clean jars with lids, a saucepan, and basic kitchen utensils. The magic lies in the brine and your creativity.
The Basic Brine Blueprint
A simple, versatile brine ratio for quick pickles is often a 1:1 ratio of vinegar to water, plus salt and optional sugar. Here’s a starting point you can tweak:
- 1 cup vinegar (white, apple cider, rice vinegar – each adds a different character)
- 1 cup water
- 1 tablespoon kosher salt (avoid iodized salt, it can cloud the brine)
- 1 tablespoon sugar (optional, adjust to your taste – less for savory, more for sweet/spicy)
How to make it: Combine these ingredients in a saucepan. Bring the mixture to a simmer, stirring until the salt and sugar dissolve completely. That’s it! Your basic pickling liquid is ready.
Always start with squeaky clean jars and lids. Wash them thoroughly in hot, soapy water and rinse well. While full sterilization isn’t strictly necessary for refrigerator pickles (since they aren’t shelf-stable), cleanliness is crucial to prevent unwanted bacteria. Also, use fresh, blemish-free produce for the best results.
Choosing Your Pickling Candidates
This is where the fun really begins! While cucumbers are classic, so many other vegetables (and even some fruits) make fantastic pickles:
- Carrots: Slice them into coins or sticks. They stay wonderfully crunchy.
- Radishes: Thinly sliced, they become beautifully pink and lose some of their sharp bite.
- Onions: Red onions turn a gorgeous jewel-tone and are amazing on tacos, sandwiches, and salads.
- Green Beans: Blanched quickly first, they make snappy ‘dilly beans’.
- Cauliflower Florets: They soak up the brine beautifully.
- Bell Peppers: Strips of colorful peppers add sweetness and visual appeal.
- Asparagus: A sophisticated pickle, great on a charcuterie board.
- Beets: Earthy and sweet, they create a vibrant pickle. Cook them first until tender-crisp.
- Zucchini/Summer Squash: Use firm, smaller ones for best texture.
- Even Fruits: Think pickled watermelon rind, peaches, or cherries for a sweet-tart treat.
Adding Flavor: The Spice of Life
Your brine is the base, but the aromatics you add to the jar are what truly personalize your pickles. Mix and match!
- Classic Dill: Fresh dill sprigs, garlic cloves (smashed), mustard seeds, black peppercorns.
- Spicy: Sliced jalapeños or other hot peppers, red pepper flakes, coriander seeds.
- Sweet & Warm: Cinnamon sticks, star anise, cloves, allspice berries (great with beets or fruit).
- Herbaceous: Thyme sprigs, rosemary, bay leaves.
- Earthy/Savory: Celery seeds, caraway seeds, turmeric (for color and flavor).
Don’t be afraid to experiment! Add a teaspoon or two of your chosen spices and herbs directly into the jar before adding the vegetables and brine.
The Simple Steps to Quick Pickle Glory
- Prepare your produce: Wash and chop your chosen vegetables into desired shapes (sticks, coins, spears, florets).
- Pack the jars: Add any whole spices or herbs (like dill sprigs, garlic cloves, peppercorns) to the bottom of your clean jar. Tightly pack the vegetables into the jar. Leave about half an inch of headspace at the top.
- Make the brine: Combine vinegar, water, salt, and sugar (if using) in a saucepan. Bring to a simmer, stirring until dissolved.
- Fill the jars: Carefully pour the hot brine over the vegetables, ensuring they are completely submerged. Tap the jar gently to release air bubbles. Add more brine if needed to keep everything covered.
- Cool and Chill: Let the jars cool on the counter until they reach room temperature. Then, screw on the lids and place them in the refrigerator.
- Wait (the hardest part!): While you *can* technically eat them after a few hours, quick pickles taste best after at least 24-48 hours, allowing the flavors to meld. They will continue to develop flavor over the next couple of weeks.
Beyond the Basics: Embracing the Pickle Possibilities
Once you’ve mastered the basic quick pickle, the possibilities expand. Try different vinegars – rice vinegar for an Asian-inspired pickle, malt vinegar for something robust. Play with the sugar levels. Add ginger, turmeric, or exotic spices. Pickle fruits to serve alongside cheese or grilled meats. The kitchen is your laboratory!
Making pickles isn’t just about preserving food; it’s a connection to resourcefulness, a celebration of seasonal abundance, and a creative culinary outlet. Sharing a jar of your homemade tangy delights with friends is incredibly satisfying. Plus, having a stash of various pickles in your fridge instantly elevates simple meals – top off sandwiches, burgers, grain bowls, salads, or just enjoy them straight from the jar as a zesty snack.
So, next time you have some extra veggies rolling around, don’t let them fade away. Grab a jar, whip up a simple brine, and dive into the fun, flavorful world of pickling. It’s a small act of preservation that yields big, tasty rewards.