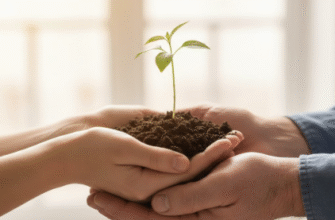
Thinking about bringing a bit of the outdoors inside? You’re not alone! Indoor gardening is a fantastic way to liven up your living space, purify the air just a little, and even grow some tasty things to eat. Maybe you feel like you have a “black thumb,” but trust me, with a little know-how, anyone can cultivate a thriving indoor oasis. It’s less about innate talent and more about understanding the basic needs of plants. This guide is here to walk you through those first green steps, turning your home into a mini jungle, one pot at a time.
The journey begins not with a shovel, but with a simple question: what do you want to grow, and where will it live? Don’t get overwhelmed by the sheer variety just yet. Start simple. Think about the conditions you can realistically provide and choose plants that match.
Choosing Your First Green Companions
For absolute beginners, it’s wise to select plants known for their resilience and forgiving nature. You want something that won’t faint dramatically if you forget to water it precisely on schedule or if the light isn’t perfect Hollywood studio quality. Here are a few reliable stars to consider:
Easy-Going Foliage Plants
- Snake Plant (Sansevieria): Almost indestructible. Tolerates low light and infrequent watering. Its upright, architectural leaves add a modern touch.
- Spider Plant (Chlorophytum comosum): Famous for its arching leaves and the little “spiderettes” it produces, which are baby plants you can easily propagate! Adapts well to various light conditions and bounces back from neglect.
- Pothos (Epipremnum aureum): A vining plant that’s incredibly versatile. Let it trail from a shelf or hanging basket. Comes in various shades of green and variegation. Tolerant of lower light and forgiving with watering.
- ZZ Plant (Zamioculcas zamiifolia): Another low-light champion that thrives on neglect. Its glossy, dark green leaves look almost artificial, they’re so perfect. Water sparingly!
Simple Succulents and Cacti
These desert dwellers are masters of water storage, making them ideal if you’re prone to forgetting the watering can. They do generally prefer bright light, though.
- Aloe Vera: Famous for its soothing gel, it’s also an easy-care succulent. Needs bright light and infrequent, thorough watering.
- Jade Plant (Crassula ovata): A classic succulent with thick, fleshy leaves. Believed by some to bring good luck! Likes bright light and well-draining soil.
- Echeveria: These form beautiful rosettes and come in stunning colours. They absolutely need bright light to maintain their shape and colour.
Herbs for Your Kitchen Sill
Growing your own herbs is incredibly rewarding. While some can be a bit fussier, others are quite beginner-friendly, provided they get enough light (usually a bright windowsill).
- Mint: Grows like a weed (sometimes too well!). Keep it in its own pot unless you want it taking over. Likes consistent moisture and good light.
- Basil: Loves sunshine and warmth. Needs regular watering. Pinching off the tops encourages bushier growth and delays flowering (which can make the leaves bitter).
- Chives: Easy oniony flavour. Tolerates less-than-perfect light better than basil. Cut them near the base, and they’ll regrow.
When selecting your first plant at the nursery or store, give it a quick check-up. Look for healthy, vibrant leaves without brown spots, yellowing, or pests. Gently check the soil – it shouldn’t be bone dry or soaking wet.
Setting Up for Success: Light, Pots, and Soil
Once you’ve chosen your plant, you need to give it a suitable home. This involves three key elements: light, the right container, and appropriate soil.
Let There Be Light (The Right Amount!)
Light is plant food. Photosynthesis, the process plants use to create energy, depends entirely on light. Different plants have different needs:
- Bright, Indirect Light: This is the sweet spot for many popular houseplants. Think of a spot near an east-facing window or a few feet back from a south or west-facing window. The light is bright, but the sun’s rays don’t hit the leaves directly for extended periods, which can cause scorch.
- Bright, Direct Light: Usually means several hours of direct sun, like right in a south or west-facing window. Cacti, succulents, and herbs like basil often crave this.
- Medium Light: Further back from windows, or in rooms with north-facing windows. Plants like ZZ plants and some Pothos varieties can handle this.
- Low Light: Doesn’t mean *no* light. It means a spot significantly far from a window or in a dimly lit corner. Snake plants are the most tolerant of truly low light, but even they appreciate brighter conditions if possible.
Observe your space throughout the day. Where does the sun hit? For how long? If natural light is scarce, don’t despair! Grow lights are a fantastic solution. Simple LED grow light bulbs can screw into standard lamps, or you can get dedicated fixtures. Full-spectrum LEDs mimic sunlight well and are energy-efficient.
Choosing the Perfect Pot
The pot isn’t just décor; it’s a crucial part of your plant’s environment. The most critical feature? Drainage holes! Seriously, this is non-negotiable for most plants (except maybe some aquatic ones, which aren’t typically beginner fare).
Never underestimate the importance of drainage holes! Without them, excess water accumulates at the bottom of the pot, suffocating the roots and leading to root rot. This is one of the most common reasons beginner houseplants fail. Always select pots with holes, or be prepared to carefully drill some yourself before planting.
Other considerations:
- Size: Choose a pot that’s slightly larger than the plant’s current root ball – usually about 1-2 inches wider in diameter. Too large a pot holds excess moisture that the roots can’t use, increasing rot risk. Too small, and the plant becomes root-bound quickly.
- Material: Terracotta (unglazed clay) is porous, allowing air and water to move through the sides. This means the soil dries out faster, which is great for succulents and cacti or those prone to overwatering. Plastic and glazed ceramic pots retain moisture longer, which can be good for thirsty plants but requires more careful watering.
Don’t forget a saucer or tray to catch excess water and protect your furniture!
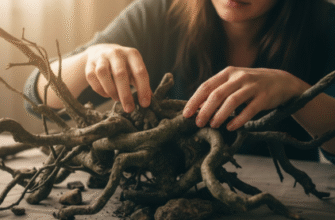
The Foundation: Potting Mix
Do not, under any circumstances, just dig up dirt from your garden and put it in a pot. Garden soil is too dense, compacts easily, doesn’t drain well enough for containers, and can harbor pests and diseases.
You need a dedicated potting mix (also called potting soil, though it usually doesn’t contain actual soil). These mixes are specifically formulated for containers, providing:
- Good Drainage: Ingredients like perlite (little white balls), vermiculite, or pumice create air pockets and allow water to flow through.
- Aeration: Roots need oxygen just as much as water.
- Water Retention: Components like peat moss or coco coir hold onto some moisture for the plant to access between waterings.
- Support: Provides a stable medium for roots to anchor the plant.
You can find all-purpose potting mixes suitable for most houseplants. For succulents and cacti, use a specialized cactus/succulent mix that offers even faster drainage. For herbs, a good quality all-purpose mix is usually fine.
Caring for Your Indoor Greenery
You’ve got your plant, pot, soil, and the perfect spot. Now comes the ongoing care: watering, feeding, and providing the right environment.
The Art and Science of Watering
Overwatering is probably the number one killer of houseplants. Underwatered plants often look sad and wilted but can usually bounce back once given a drink. Overwatered plants develop root rot, which is much harder to recover from. So, how do you get it right?
Forget watering on a strict schedule. Environmental factors (light, temperature, humidity, pot type, plant size) constantly change how quickly the soil dries. Instead, check the soil first!
The classic method: Stick your finger about an inch or two deep into the soil. * If it feels damp, wait. * If it feels dry, it’s time to water.
When you do water, water thoroughly. Pour water evenly over the soil surface until it starts to drain out of the bottom holes. This ensures the entire root ball gets hydrated. Let the pot drain completely in a sink or bathtub, then discard any excess water collected in the saucer after about 15-30 minutes. Don’t let the pot sit in standing water.
Most common houseplants prefer the soil to dry out somewhat between waterings. Succulents and cacti need the soil to dry out completely. Herbs and some foliage plants (like ferns, if you venture there) prefer more consistent moisture but still shouldn’t be waterlogged.
Tap water is generally fine for most hardy beginner plants. If you have very hard water or heavily chlorinated water, letting it sit out overnight before watering can allow some chlorine to dissipate and minerals to settle.
Temperature and Humidity
Most common houseplants thrive in typical indoor temperatures – roughly 65-75°F (18-24°C). Avoid placing them near drafty windows, heating/cooling vents, or radiators, as sudden temperature fluctuations can stress them.
Humidity can be more challenging, especially in homes with dry air from central heating or cooling. Many popular houseplants originate from humid, tropical environments. Signs of low humidity include brown leaf tips or edges. While some beginner plants are quite tolerant, you can boost humidity by:
- Grouping plants together: Plants release moisture through transpiration, creating a slightly more humid microclimate.
- Using a pebble tray: Place the pot on a tray filled with pebbles and water. Ensure the bottom of the pot sits on the pebbles, not directly in the water, to prevent root rot. Evaporation from the tray increases local humidity.
- Using a humidifier: The most effective method for significantly increasing room humidity.
Misting is often suggested but provides only temporary relief and can sometimes encourage fungal issues on leaves if done excessively or in poorly ventilated areas. Focus on more consistent methods like pebble trays or grouping.
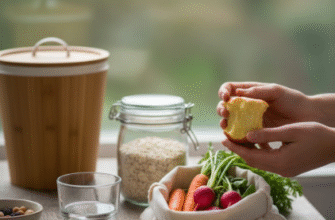
Feeding Your Plants (Fertilizing)
Potting mix contains some initial nutrients, but these get depleted over time as the plant uses them and as they leach out with watering. Fertilizing replenishes these essential elements.
Don’t overdo it! Too much fertilizer can burn roots and harm your plant. For beginners, a balanced liquid houseplant fertilizer diluted to half-strength is a safe bet. * Fertilize mainly during the active growing season (spring and summer). * Reduce or stop fertilizing in fall and winter when plant growth naturally slows down. * Always follow the instructions on the fertilizer package, erring on the side of using less rather than more. * Never fertilize a plant that is stressed (severely wilted, diseased) or dormant.
Troubleshooting Common Beginner Problems
Even with the best care, you might encounter issues. Don’t panic! Here are a few common ones:
- Yellowing Leaves: Can be caused by many things! Overwatering is common (check soil moisture!). Underwatering can also cause yellowing and wilting. Nutrient deficiency (if you haven’t fertilized in ages) or too much direct sun for the plant type are other possibilities.
- Brown Leaf Tips/Edges: Often a sign of low humidity or inconsistent watering (letting the soil get bone dry, then soaking it). Sometimes caused by minerals in tap water building up – try using filtered or distilled water occasionally.
- Wilting: Usually means thirst – check the soil! However, paradoxically, severe overwatering can also cause wilting because the rotting roots can no longer absorb water. If the soil is soggy and the plant is wilting, root rot is likely.
- Pests (Gnats, Spider Mites, Mealybugs): Inspect your plants regularly, especially the undersides of leaves. Fungus gnats (small black flies hovering around the soil) are annoying but mostly harmless to established plants; they thrive in consistently moist soil, so letting the top layer dry out helps. Spider mites (tiny webs, speckled leaves) and mealybugs (white, cottony spots) need more direct action – wiping leaves with a damp cloth, using insecticidal soap, or neem oil spray can often control minor infestations.
Regularly inspecting your plants is key to catching problems early. Check under leaves and around stems weekly when you check the soil moisture. Early detection makes dealing with pests or diseases much easier. It also helps you get familiar with your plant’s normal appearance.
Enjoying the Journey
Indoor gardening is a continuous learning process. Don’t be discouraged if you lose a plant along the way – it happens to even experienced gardeners! Each plant teaches you something new. Start small, learn the basics with forgiving plants, and gradually expand your collection as your confidence grows. Observe your plants, respond to their needs, and most importantly, enjoy the simple pleasure of nurturing life and bringing a touch of green beauty into your home. Happy gardening!